Visualization of Enkare Mbagathi Cottages Kajiado County, Kenya
Tuesday, 19 November 2019
Hello,
Introduction
Thank you for giving us the time to share one of our visualization projects. We are really excited to present the making of it here. We would also like to take the opportunity to thank the University of Nairobi Architecture panel and students whose critiques and comments inspired the achievement of even better results.
Download PDF Version here.
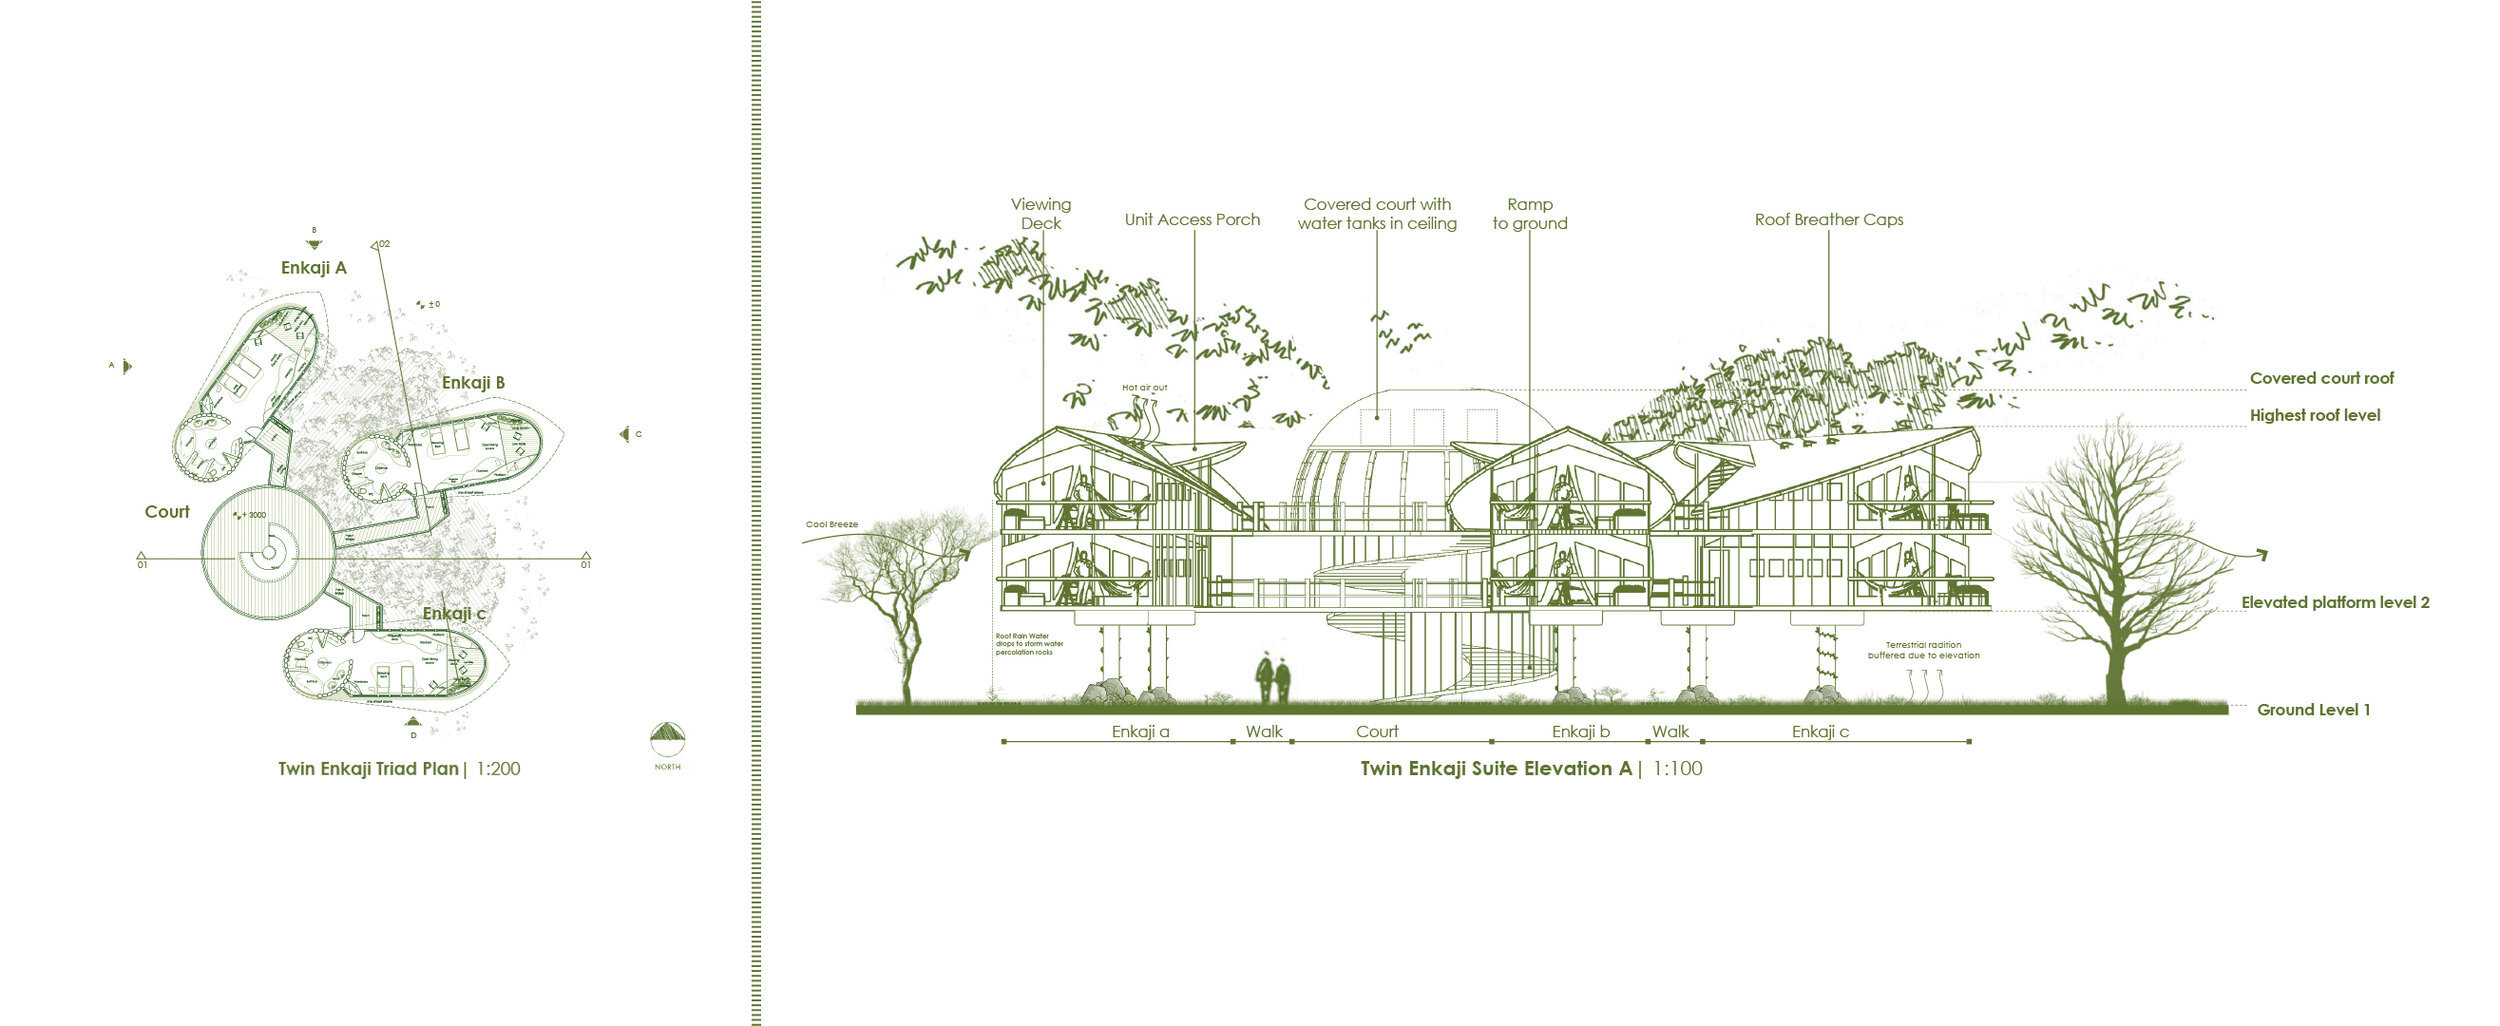
Twin Enkaji Plan and Elevation
Project Overview
This particular conceptual project is located on the edge of River Mbagathi next to the Nairobi National Park. The design, tried to create a place for tourists who have traveled so far to view the park and are therefore in need of a resting space away from the bustle of the urban environment.
The lodge is located next to a river hence the genius was in the response towards viewing the river, while still ensuring for free human and animal conflict. So how does one capture this?
This article will focus on our methods and technique used in visualization of this project and not on the design process. That will be covered in a separate article. Below is the final result of the Twin Enkaji Cottage:
RENDERING STEPS
The Rendering workflow employs the 5SRW method by Ciro Sannino. This method is recommended especially for beginners in visualization. The steps include:
Framing > Light Balance > Materials > Final Render > Post Production
1. FRAMING
Framing involves placement of a subject in relation to other objects. Framing can make an image aesthetically pleasing and keep the viewers focus on the framed scene. The aspects below were applied during framing of the composition:
Filling the frame
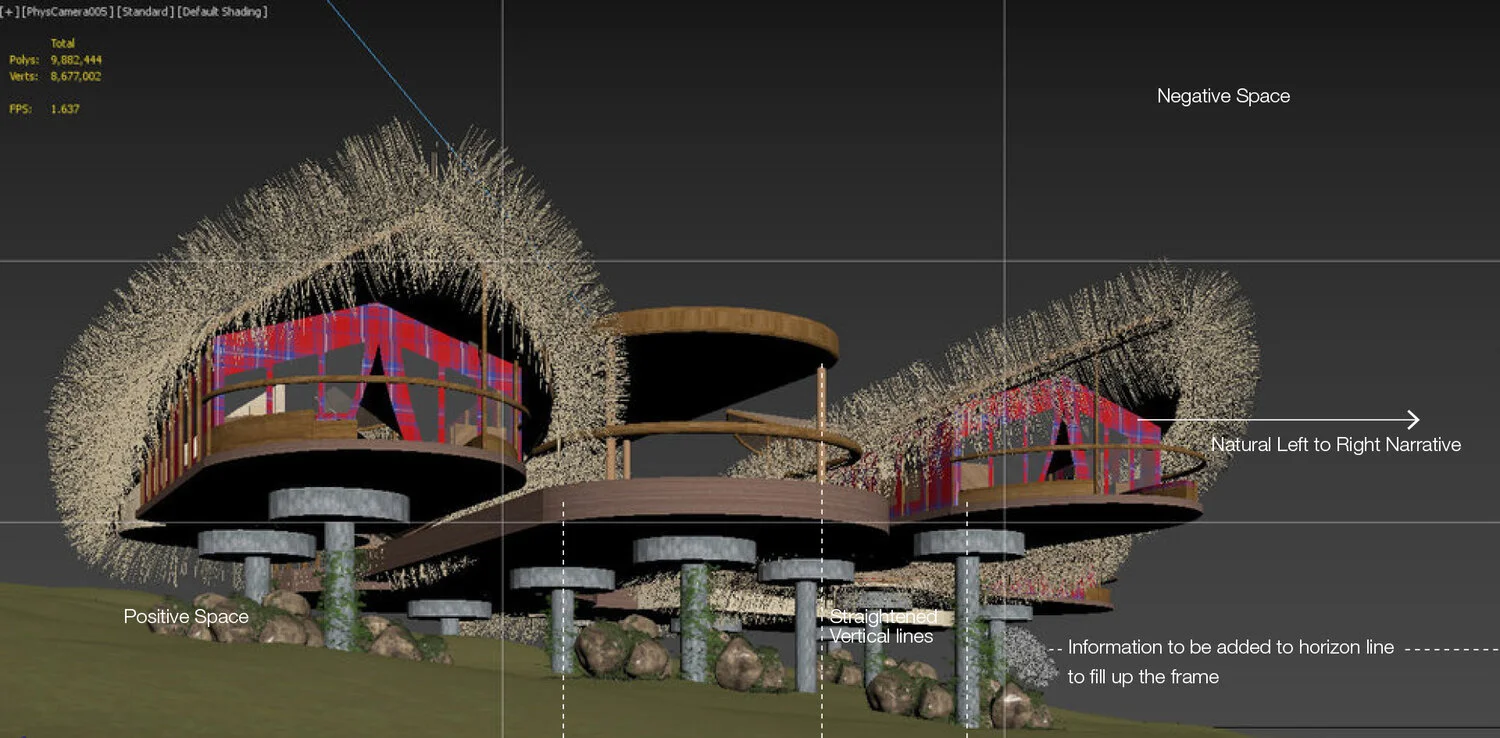
Since the scene is virtual, it is important to ensure the framed view does not leave meaningless empty spaces. As in figure 1, the horizon is empty which is unrealistic. However this will be updated during post production. So fill up the frame while balancing positive and negative spaces in the frame.
Frame height
Because most real photos are taken from the ground by a human being, the rendering camera was placed 1200mm off the ground (slightly closer to the ground to create some drama).
40mm Focal Length
We preferred a medium focal length lens. Lower focal lengths tend to have perspective distortion on the corners due to their wide angle while larger focal values magnify the image or zoom in too close.
Building face
Seeing that we naturally read from left to right, the building faces towards the right. Some negative space in front of the building was also left to allow it to ‘breathe’ naturally or it would seem too tightly framed.
Vertical correction
The building is fairly low as compared to towering buildings hence perspective deformation would be working against the composition. To correct this, the auto-tilt vertical corrections is checked to ensure that the vertical lines of the building are parallel to the frame. This prevents perspective deformation.
Framing the view using the 3ds Max Physical Camera
40mm Focal Length
150 ISO
1/500 Shutter Speed
2. LIGHT BALANCE
As the setting is an outdoor scene, the only source of light required is the sun. Natural light can easily create a flat image if not well used hence we need to take advantage of the shadows. The sun was set slightly low to cast softer light with less glare. The shadows are stretched out onto the facade of the units creating interesting shadows from the edge of the roof. Also notice that the position of the sun on plan view is to the side and not directly behind the camera. Natural light therefore comes into the frame from the left casting shadows to the right. If the sun was directly behind the camera, shadows might be more difficult to discern creating that flat image look which is undesirable in this case.
“To achieve a good balance between light and shadows when rendering an exterior in daylight, I prefer to have more than half of the image in direct light and the rest in shadow, making sure that the sun isn’t too high and that it enters from the side.” Sannino, 2013.
Vray sun lighting from the side and camera position at the human height for a better sense of scale
Testing for Light Balance using a Clay Model Render
3. MATERIALS
The use of Colour and texure has a great way to convey concepts or meaning. The direction was to use warm earthy palettes inspired by the Savanna image. The colors that came to mind were browns and natural greens but the design seemed mundane. Since the Kajiado area is dominated by the Maasai community, a Maasai texture was decided upon. The result is exciting visual drama.
Sketch illustrating a basic colour theme to be employed
4. FINAL RENDER
Vray was set as the renderer from the render setup tab. The settings are fairly straightforward. Most parameters are set as default, aside from the highlighted variables in yellow. For the roofing, the 3Ds Max Hair and Fur modifier was used as per this Youtube tutorial.
A fairly common problem starting 3DS max and Vray users experience is a washed out image when rendering. This is often due to the exposure setting turned up by default. To fix this reference the camera settings below as a starting point.
Render Settings - Vray Settings and Camera Settings
5. POST PRODUCTION
Vray was set as the renderer from the render setup tab. The settings are fairly straightforward. Most parameters are set as default, aside from the highlighted variables in yellow. For the roofing, we decided to use the 3Ds Max Hair and Fur modifier as per this Youtube tutorial.
Twin Enkaji Cottage Render
King Enkaji Cottage Render
REFERENCES
Sannino. C. (2013), Photography and rendering
NOTES
About Carbnstudio
Carbnstudio is a computer graphics imaging service in Nairobi, Kenya offering visualization services for the construction industry. These solutions equip clients with accurate imagery for the concepts they have worked hard to realize.
The ‘Begin to imagine’ proposition follows 4 years of visualization success and inspires the company to think of exciting ways to communicate visually. By leveraging the power of computer graphics and design knowledge, Carbnstudio continues to communicate concepts one frame at a time.
For more information please visit https://www.carbnstudio.com
For and behalf of CARBNSTUDIO
Tel: +254 725 326 542
E: info@carbnstudio.com


